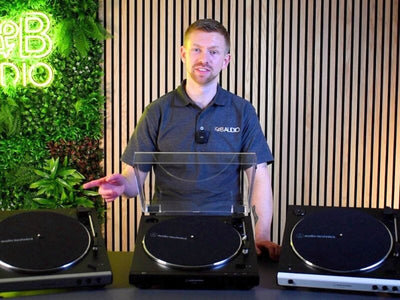
IN THIS ARTICLE: We'll show you how setup your new turntable and active bookshelf speakers...
… in a step by step guide complete with pictures, tips & tricks to get you up and running smoothly.
You may be eagerly awaiting your new record player system to arrive, or perhaps you’re still on the fence and wondering how easy is it to set up a turntable with speakers?
Fear not, in this article we will show you how to set up a turntable with powered speakers.
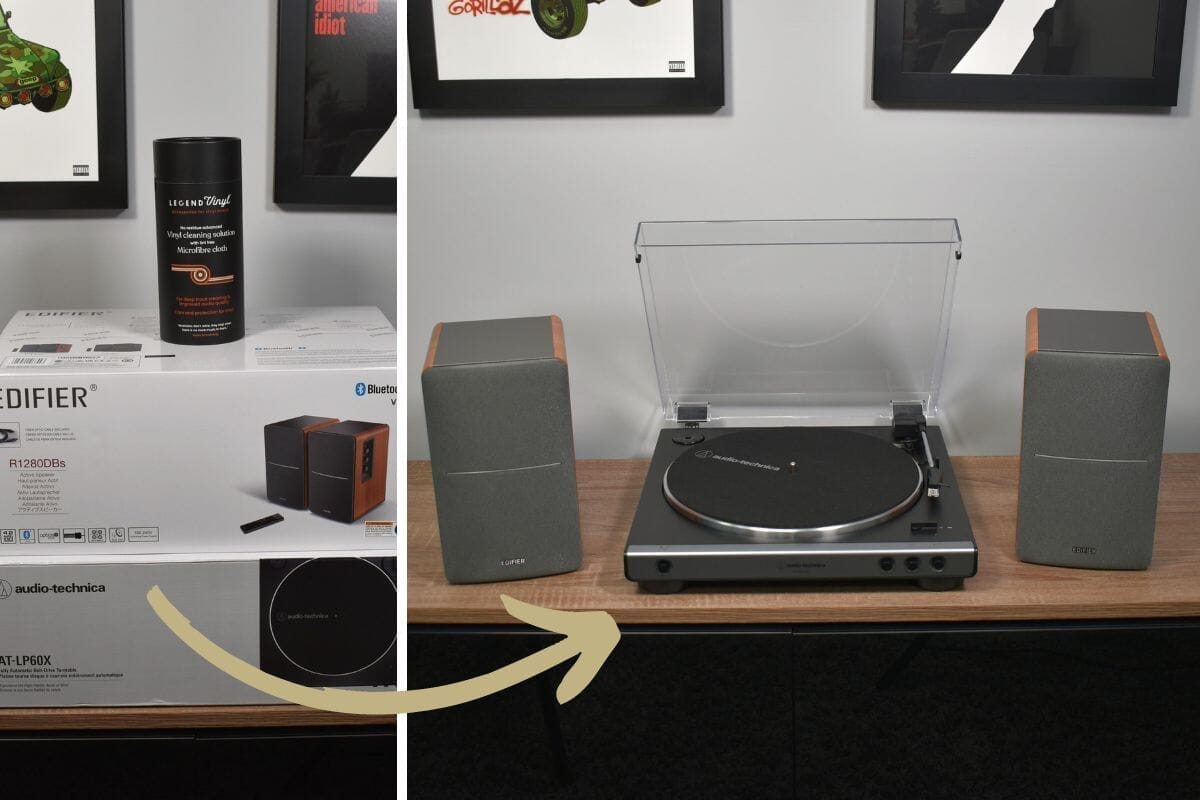
For the purpose of this guide we’ve selected our most popular turntable with speakers bundle; the Audio-Technica LP60X with the Edifier R1280DB.
However the principle is the same for almost all turntables with powered speakers, especially the ones you’ll find here on our site.
How To Set Up A Turntable & Speakers

Step 1: Set Up The Record Player
Turntables are relatively easy to set up, most of the ones you’ll find on our site arrive (mostly) assembled ready to use.
First, carefully unbox the turntable and set aside the packaging.
Place the turntable on a secure, level surface such as a HiFi stand or sideboard.
It’s important that it’s placed level and on something sturdy to prevent movement & vibrations which will affect your music.
Most turntables will come pre-assembled with the dust cover fitted, stylus fitted and platter in place.
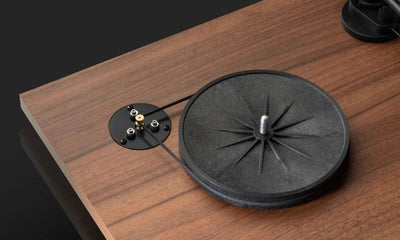
The Audio-Technica LP60X range however has the platter stored separately in the box which needs to be placed onto the turntable.
- Carefully place the platter on the turntable (the belt is pre-fitted to the platter)
- Spin the platter until you can see the belt drive spindle (top left)
- Place the belt over the spindle.
 Once the belt is installed you need to setup the auto start stop mechanism.
This is an important, but often overlooked step.
Now that your belt is installed and the slip mat is back on, let’s quickly set up the auto start/stop mechanism to avoid any potential issues.
- With the turntable turned off, press and release the stop button.
- Hold the tonearm in the rest with one hand, use your other hand to slowly rotate the platter in a clockwise direction for 10 full rotations.
- Place a record on the platter.
- Plug the turntable into the power and press and release the “Start” button.

READ MORE: You can find a more detailed guide to installing the belt here.
TEAC turntables come pre-built, simply place it where you want it to sit and it’s ready to plug in. (p.s if you’ve bought a TEAC turntable and can’t find the power supply, it’s hiding in the end of the polystyrene packaging!)
Step 2: Set Up The Speakers
Active bookshelf speakers are made up of two parts.
Firstly the active speaker, this one has the built in amplifier and all the audio input connectivity.
It is usually the right channel so should be on your right hand side (this is for the Edifier R1280DB, always check your specific speakers though in case they differ. Some speakers such as the Q Acoustics M20 have a selector to choose which is left or right)
The second speaker is passive and wires into the active speaker using the speaker cable.
- Place the active speaker in the desired position (right) and plug it into a socket outlet.
- Place the passive speaker in the desired position (left)
- Run the two core speaker cable between the two speakers and connect to the red and black terminals of each, ensuring that the red connects to the red and the black to the black.
- Turn the socket on and your speakers are set up.
Step 3: Connect The Two Together
Now that you’ve positioned the turntable and speakers it is time to connect the two together.
The best, and most common, way to do this is by plugging the turntable into the speakers with an audio cable.
However, if you’ve opted for a Bluetooth turntable then you can link it wirelessly allowing you to position the turntable in a different position to the speakers.

Wired
This is quick and easy.
You’ll get an audio cable with the turntable, it’s most commonly a 3.5mm to RCA jack cable or an RCA to RCA jack cable.
Plug one end into the turntable.
Plug the other end into the LINE IN of your speakers.
The cables that come with the turntable are adequate, but we’ve found using a better quality cable such as the QED Connect range, which are quite reasonably priced, gives a better sound quality and less background humming when in standby.
If your turntable has a preamp bypass then make sure the switch on the back is set to “LINE”.
If your turntable doesn’t have a preamp then you’ll need a separate phono stage in between the turntable and your speakers.
Recommended Read: Do I Need A Preamp For My Turntable?
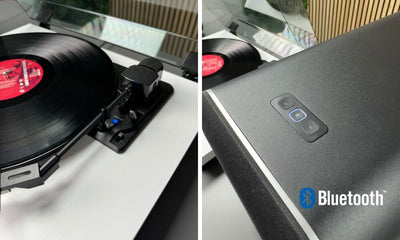
Bluetooth
If you’ve opted for a Bluetooth turntable then you can connect it to compatible Bluetooth speakers wirelessly allowing you to put the turntable in a different position to the speakers without needing to cable them together.
This process can be a bit of a pain to connect up the first time but it’s relatively simple.
We’d recommend that you first read the instructions of your specific turntable.
They are all relatively the same, but to save yourself any unnecessary aggro it’s worth a scan of the manual to familiarise yourself with the exact steps your turntable needs.
Next you want to do yourself a massive favour and go and turn off ALL Bluetooth speakers or devices in your house.
I have multiple Bluetooth ceiling speakers in my house and my TEAC TN-400BT connected to every single one of them before it connected to the R1280DB’s sat a metre away from it!
The process then goes as follows;
- Turn off all Bluetooth devices other than the turntable and your speakers
- Put the speakers into pairing mode
- Put the turntable into pairing mode
- Wait for the magic to happen
- When the turntable light is solid you should be connected and ready to play!
Once paired it usually reconnects to the last connected speaker easily without having to go through that process again.
Step 4: Select The Speaker Mode
Now that everything's connected up you’ll need to make sure that the speakers are powered on and set to the right mode ready to play music.
First power the speakers on at the wall socket and then turn them on, for the R1280DB you simply press the volume button on the side which doubles as an on/off and input source selector.
If you’ve connected your speakers and turntable with a cable then you’ll need to select the “AUX” input.
Don’t forget that a lot of powered speakers have multiple AUX inputs, the R1280DB for instance has two, so make sure you select the correct input.
The R1280DB’s light will be green for AUX input mode.
If you’re connected by Bluetooth then you’ll want to select the Bluetooth mode which is most commonly indicated by a blue light.
 It’s worth double checking at this point that your turntable is on, set to Bluetooth mode and that the lights are solid indicating that the two items are paired.
That’s it, you’re now ready to enjoy your music!
Step 5: Enjoy Your Music
Now that your system is completely set up you have the most important and most likely the hardest job to do.
You need to choose the first vinyl record to play on your system!
Once you have made that tough choice, carefully remove the record from its protective sleeve and place it on to the turntable platter.
PRO TIP: It’s important to handle, clean and care for vinyl records properly otherwise you can damage your records and/or turntable.
We’d recommend that you take a read of these guides;

How To Use An Automatic Turntable
The Audio-Technica LP60X is a fully automatic turntable so you simply need to press the “Start” button.
After a few seconds the tonearm will raise, move over to the record and then gently lower itself onto the record and your speakers will spring into life.
When the record finishes playing the tonearm will raise, return to the holder and the platter will automatically stop spinning.
Make sure that you set the correct record size using the lever on the front of the turntable, the two options are 7” and 12” and this setting ensures that the tonearm moves to the correct location on the platter for the relevant record size.
You may also find some “semi-automatic” turntables.
These are a combination of the two, you need to place the tonearm onto the record manually however when it reaches the end of the record it’ll automatically return the tonearm to the rest position.

How To Use A Manual Turntable
If you have a manual turntable then as the name suggests you have to move the tonearm into position yourself and lower it using the raise/lower arm on the tonearm.
First press the start button and let the platter start spinning.
Ensuring the tonearm is raised using the lever, gently move it across to the starting position of the vinyl record.
Then, using the lever, lower the tonearm onto the record.
When the needle makes contact with the record your speakers will spring into life.
Make sure that you use that raise / lower arm rather than just dropping the stylus onto the record by hand, it’s not going to make your stylus last long and may damage your records.
When you get to the end of the record the turntable will keep spinning so it’s important that you are ready to end playback.
- Raise the tonearm using the lever.
- Press the stop button to stop the platter from spinning
- Return the tonearm to its resting position.
Troubleshooting
There Is No Sound Output
Make sure that everything is switched on, all cables are connected securely.
Also make sure that the speakers are set to the correct input mode and finally make sure the volume is turned up.
Make sure that the stylus is correctly installed.
There is a guide to installing the stylus here.
The Turntable Platter Isn’t Spinning
This is a common problem we get with the Audio-Technica LP60X range in particular, but fortunately it’s just a setup issue, not a fault!
Make sure that you connect the belt to the spindle drive when you place the platter on.
It’s easily missed, but it’s a critical step.
There is a more comprehensive guide to installing the belt here.
The Tone Arm Isn’t Lowering
For manual turntables the raise / lower lever should do just that, raise and lower the tonearm.
With the LP60X range you have a button on the right hand side of the front panel that allows for raising and lowering of the tonearm.
If you press start, the tonearm tracks across to the record but doesn’t lower then you likely have the tone arm raised. Just tap that button and the tonearm will lower.
This button is used for changing tracks, you can raise the arm, manually move it to the desired position then drop the tonearm.
The Sound Output Is Really Quiet
A lot of turntables have a built in preamplifier with the ability to bypass it, so make sure that if there is a switch on the back of your turntable that it is set to “LINE” which then turns the preamp on and will amplify the sound to the speakers.
If you bought a higher end turntable such as a Rega or Pro-Ject then check whether it has a built in preamp or whether it needs a separate phono stage between the speakers and the turntable.
Recommended Read: Do I Need A Preamp For My Turntable?
My Record Is Playing Fast / Slow
Most turntables have different speed settings for different records.
The two main ones are 33 and 48 rpm.
LP’s are usually 33 rpm and singles are 48 rpm
If you try to play an LP at 48 rpm it’ll sound really fast, and likewise if you play a 48rpm at 33rpm it’ll sound very slow.
So make sure that you set your turntables speed to match that of the record you’re trying to play.
There Is Some Background Humming
You may experience some humming in the background when the record is not playing but the turntable and speakers are powered on.
This is a ground loop issue and is resolved either by upgrading to a better quality cable, fitting a ground loop isolator or grounding the turntable.
If you can’t hear it when playing then it may not be an issue, just don’t leave the turntable and speakers powered on when not in use.
Recommended Read: How Do I Stop My Speakers From Buzzing / Humming?
My Turntable Won’t Connect Via Bluetooth
This is usually because the speakers aren’t in Bluetooth pairing mode because a phone or other device is already connected to it.
Check that your phone isn’t paired with the speakers and that the turntable isn’t connected to a different speaker and ensure that every Bluetooth speaker in your house is off before trying to set it up as the turntable may be connecting to another random speaker in your house.
Conclusion

As you can see, setting up a turntable with powered speakers is a relatively simple task and shouldn’t take too long.
The principle is the same across most powered speakers and turntables and you’ll be enjoying your records in minutes.
If you need any further help when setting up your record player system please feel free to contact us by email, live chat or by calling us on 02393 190955.