
- How to plan your speaker layout
- The best place to install the amplifier
- Speaker placement and maximum cable lengths
- Wiring the cables
- Choosing the best outdoor speaker cable
- Installing the cables
- Testing & Troubleshooting
... I'll also include links to recommended products and other guides you'll find useful whilst designing your outdoor speaker system.
When it comes to creating a captivating outdoor entertainment space, installing outdoor speakers can elevate your gatherings, parties, and relaxation time.
However, setting up outdoor speakers involves more than just selecting the right equipment and finding the perfect spot for them.
One crucial aspect of outdoor speaker installation is the cabling.
In this comprehensive guide, we will explore the ins and outs of outdoor speaker cabling and provide you with essential tips to ensure a seamless and enjoyable audio experience in your outdoor oasis.
Planning Your Speaker Layout
Before diving into wiring your speakers you should carefully plan the placement of your outdoor speakers and map out the optimal wiring route.
It may seem like a daunting task, but by the end of this guide you’ll have a good understanding of what and how - we’d just recommend that you give yourself some time to install it properly, don’t leave it until 30 minutes before the big BBQ.
Let’s start by considering the following:
Amplifier Location
For most outdoor speakers you’re going to need an amplifier.
This would need to be installed indoors in a dry indoor environment such as a garage, garden room or the kitchen.
This is the starting point for your speakers so you’ll need to be able to get a cable from this amplifier out to your speakers.
Also consider how close the amplifier is to the listening position? If you’re streaming from Bluetooth you’ll want to be with about 5M for optimum performance.
If you’re streaming via WiFi then you can be anywhere, as long as your amplifier/streamer has a good WiFi connection.
Further Reading: Outdoor Speaker Amplifier Guide: How To Power Your Speakers
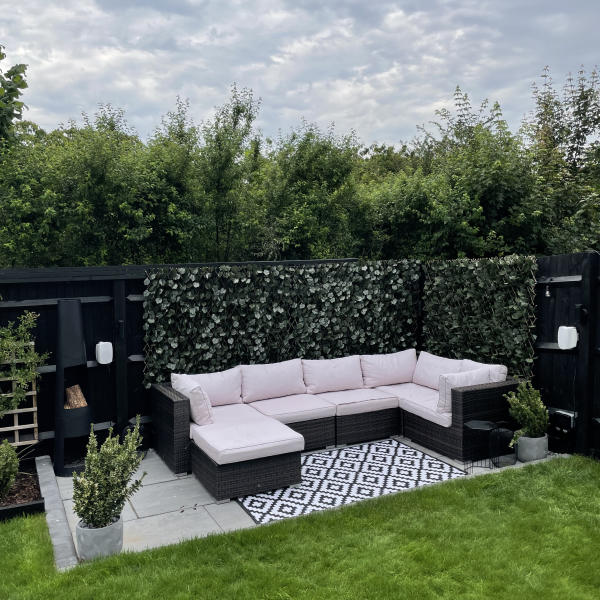
Speaker Placement
Determine the desired location of each speaker to achieve balanced sound coverage throughout your outdoor area.
How far is this from the amplifier location? Ideally you want to position your amplifier and speakers in a similar location to cut down on the cable length.
Cambridge Audio has a great maximum cable length table which you might find useful when planning your wiring.

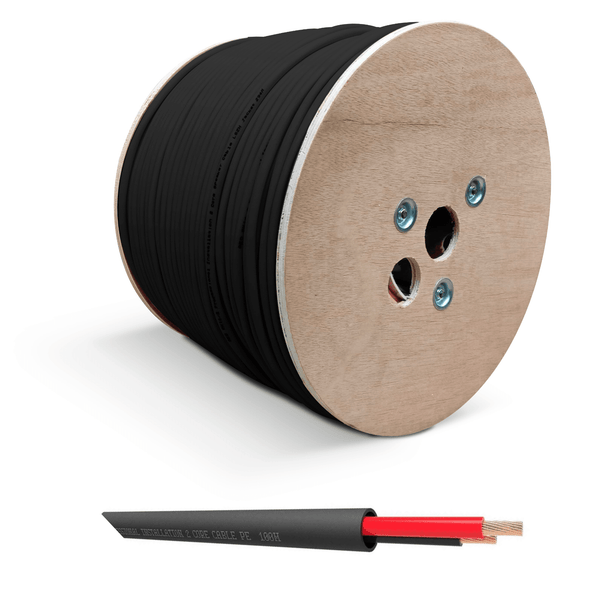
All of our outdoor speaker cables are 16 AWG so if you’re having one pair of speakers (8 ohms) then you should be within approx 15 metres from each speaker.
If you’re using two pairs of speakers (4 ohms) then they recommend no more than 7.3 metres away.
So if you need longer cable runs then consider increasing the size of the cable.
Consider factors such as proximity to power sources, obstructions, and the need for weather protection.
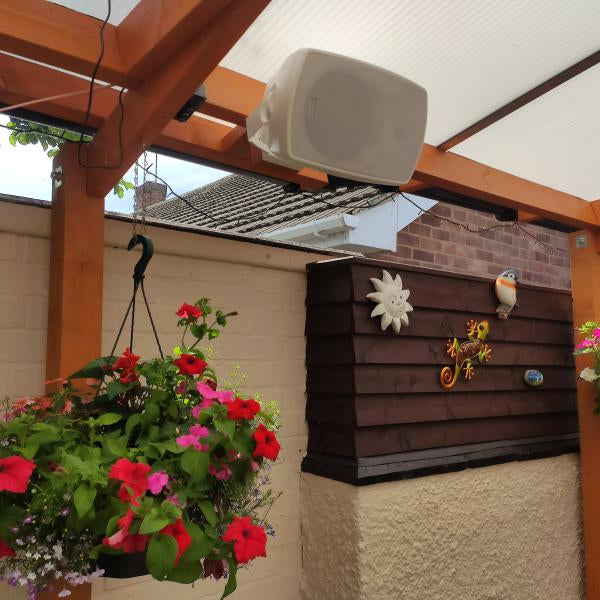
Most outdoor speakers are designed to be left out year round, but you can prolong the life and lower maintenance requirements by clever positioning of speakers under eaves, garden structures etc.
Wiring Route
This is probably the most important, awkward and time consuming part of installing outdoor speakers.
But if you get it wrong you’ll have issues.
You’ll want to identify the shortest, tidiest route between the amplifier and the speakers (remember the cable lengths mentioned above)
It may be along the garden beds, through the garage roof or from the kitchen to the patio wall.
Aim to hide the cable as much as possible whether that’s within the fabric of a building or by digging a small trench.
Whilst outdoor speaker cable is technically not covered by electrical regulations our motto is to treat it like it is, and install it accordingly.
Avoid power supply, avoid direct sunlight, go round the pond instead of through it etc!
Choosing the Right Outdoor Speaker Cable
When it comes to outdoor speaker cable, quality matters.
Opting for cable specifically designed for outdoor use is crucial to ensure durability and longevity.
Hint: don’t use indoor speaker cable.
Here are some factors to consider when selecting the right outdoor speaker cable:
-
Gauge: The gauge refers to the thickness of the wire. Thicker wires (lower gauge numbers) are better suited for long distances and high-power applications.
For most residential outdoor speaker setups, 16 or 14-gauge wires are commonly used.
-
Direct Burial or In-Wall Rated: Outdoor speaker wires should be rated for outdoor use and capable of withstanding exposure to moisture, UV rays, and temperature fluctuations.
Look for wires labelled as "direct burial" or "in-wall rated" for added protection against the elements.
-
Copper vs. Copper-Clad Aluminium: Copper wire is the preferred choice for outdoor speakers due to its superior conductivity and corrosion resistance.
Avoid copper-clad aluminium wires, as they are more prone to oxidation and can degrade over time.
We almost solely sell and use the QED outdoor speaker cables.
It’s surprisingly competitive price wise, but it’s high-quality full copper cable with UV protection.
You wouldn’t scrimp on your car tyres so think of it the same with your outdoor speaker cable, buy it once and enjoy the system for years.
Pro Tip: It is often a good idea to use four core outdoor speaker cable for wiring outdoor speakers. You can then run one single cable from the amplifier to the first speaker, then a single cable from the first speaker to the second speaker.
At the amplifier you connect all four cores (left & right) then at the first speaker you connect the + & - for the left and through connect the other two cores onto the second speaker. (two cores are then redundant)
The cable might cost more, but it cuts down on cable containment and makes things a lot easier so may balance out overall.

Installing The Cables
Once you have planned the layout, it's time to install the outdoor speaker wiring.
Follow these steps for a successful installation:
Step 1: Measure & Cut The Cables
Measure the distance between the amplifier and each speaker accounting for any additional length required for wire routing.
You can either cut the wires to the appropriate lengths, leaving some extra slack for flexibility during installation, and pull both cables in at the same time or a safer way of doing it is to run one cable at a time - it’ll take you longer but you don’t need to worry about getting the measurements wrong.
Step 2: Run The Cables
Route the wires along the predetermined path that you chose earlier, using clips or fasteners to secure them to walls, fences, or other structures.
It is really important that you take the time to secure the cable along its length, not just for safety of snagging cables etc but also because it’ll look significantly neater and tidier.
The last thing you want is a kid getting tangled in the cables, pulling the speakers off the fence etc!
Also avoid running the outdoor speaker cable near electrical cables or other potential sources of interference.
Step 3: Protect The Cables
Just to reiterate on the point mentioned above, it’s important to correctly install the cables.
When cables run along fences / buildings use conduit or conduit sleeves to protect the wires against physical damage, UV exposure and moisture ingress.
Bury the cables underground or hide them within landscaping features whenever possible.
Step 4: Connect The Cables
Strip off approximately 10 mm of insulation from each cable end.
Connect the positive (+) terminal of the speaker to the corresponding positive terminal on the amplifier and repeat the process for the negative (-) terminals.
Most outdoor speakers have standard spring terminals so you simply need to place the bare wire through the spring connector, release it and it’ll clamp tight.
Testing & Troubleshooting
If you’ve followed all of the above steps you should now have your speakers wired back to the amplifier all neat and tidy.
The final step, and the best one, is to test out the system!
Fire up that amplifier and play your favourite song on Spotify.
Then check that both speakers are working and sound as they should.
If you have any distortion issues check that your cables are correctly connected and that the polarity is correct with + to + and - to -.
Once you’ve completed testing you’re ready to fire up the BBQ and enjoy some music!


