IN THIS ARTICLE: We'll cover how to connect your WiiM AMP or Ultra to a television…
… we'll also cover common issues with some troubleshooting.
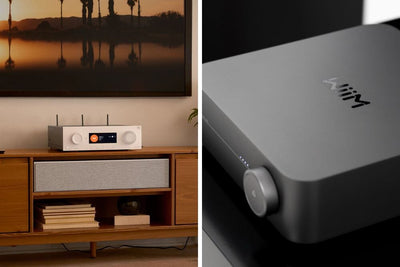
If you want to upgrade your TV’s sound quality without the complexity of a full home cinema system, connecting your TV to the WiiM AMP is a simple and effective solution.
Built-in TV speakers often sound flat and lack the depth needed for an immersive experience, especially when watching movies, TV shows, or playing games.
Our most common use case is in kitchens and living spaces, you’re installing a ceiling speaker system anyway, so why not connect that TV in for an even better experience?
By using the WiiM AMP, you can enjoy richer, more dynamic audio through your speakers, enhancing everything from crisp dialogue to deep bass effects.
The good news?
Setting it up is incredibly easy and doesn’t cost a great deal of money to do, with just a few simple connections, you can route your TV’s audio through the WiiM AMP and transform your entertainment setup.
In this guide, we’ll walk you through the different ways to connect your TV to the WiiM AMP, so you can start enjoying high-quality sound in no time!

Step 1: Making The Connection

Method 1: Using A HDMI Cable
The easiest and most cost-effective way to connect your TV to your WiiM AMP is to use a HDMI Cable.
If your amplifier and WiiM AMP are with a 10 metre cable run of each other then it’s a really cheap and easy connection, even our high-quality 10 metre HDMI cables are only £16.
Need a long cable? You can now buy fibre optic HDMI cables in lengths up to 150 metres for cheaper than most decent HDMI extenders which still makes a dedicated cable the best choice.
If you're wiring from scratch, always use a HDMI cable for this job. It'll work out easier and cheaper by the time you're finished!
What You Need:
- 1 x HDMI Cable
Steps:
- Run the HDMI cable between the TV and the WiiM AMP ensuring that it’s kept away from power cables and is not kinked or twisted in any place.
- Plug the HDMI cable into the TV’s eARC HDMI port. Most TV’s will only have one eARC compatible port so make sure you plug into the correct port.
- Plug the HDMI cable into the WiiM AMP.

You’re now connected and ready to move onto the next step, setting up your WiiM AMP.
Important Note: It’s important to check if your cable isectional. Most cables over 10 metres long have a "Source" and “Display” written on the ends. The source must go at the AMP and the display must go at the TV otherwise the cable will not work.
Method 2: Using A HDMI eARC Extender Set
It’s become common practice to run CAT 5 or CAT 6 data cables around your home for network, video and much more.
Usually you’d connect a little black box to each end of the cable then you can magically transmit the video over the network cable.
However, these HDMI extender boxes typically don't work with eARC which means you can't send the TV sound back from the TV to the amplifier, or control the amplifier using the TV's CEC function.
Until now!
With the Blustream CAT100EARC you can easily transmit the audio and CEC control for a reasonable price. So if you’ve only got a data cable between the amplifier and TV you can still take full advantage of the WiiM’s HDMI eARC input for seamless TV sound.
If you only have a data cable between your devices you have no other option but to use an eARC compatible HDMI extender such as the Blustream model mentioned.
Note that if you're reading this and haven't yet wired your system we'd advise opting for method 1 and using an optical HDMI cable for long runs - it's easier & cheaper.

What You Need:
- 1 x eARC Compatible HDMI Extender (Blustream CAT100EARC)
- 2 x HDMI Cables
- 1 x CAT 5/6 Ethernet Cable
Steps:
Between The TV & WiiM AMP:
-
Run a CAT 6 data cable between the TV and the WiiM AMP. Ensure that the cable is correctly installed and not run with any power cables.

TV Position:
- Install the “Transmitter” (TX) at the TV position, power it with the included power supply.
- Connect a HDMI cable from the TV to the input of the transmitter. Ensure you connect to the input marked "eARC" otherwise it won't work. This isn't always HDMI 1 so double check first, our Sony TV in the pictures has eARC on Input 3.
- Plug the CAT 6 cable into the RJ45 connector on the transmitter.
- Make sure the switch is set to "eARC" (Not optical like our pictures!)

WiiM AMP Position:
- Install the “Receiver” (RX) at the WiiM AMP position, no power supply is required as it will power over the ethernet cable.
- Connect a HDMI cable from the WiiM AMP to the output of the receiver.
- Plug the CAT 6 cable into the RJ45 connector of the receiver.
- You are now connected and ready to move onto step 2, setting up the WiiM AMP app.

You can actually use the power supply at either the transmitter or the receiver which gives you greater flexibility. The blue power icon will light up blue on both boxes to confirm that power is present, you’ll also see yellow and green lights above the RJ45 to confirm data is transferring.
Note: It’s important to use high-quality, full copper CAT 6 data cable for best performance. We’d also recommend that you avoid using wall plates or patch panels where possible, the less connections the better.
Step 2: Setting Up Your WiiM AMP
Once you’ve made the connection we need to set the WiiM AMP to the correct settings otherwise it will not automatically turn on.
- Open the WiiM Home app and go to the “Devices” screen.
- Find the WiiM AMP in your devices tab and click the settings cog in the bottom right corner of the zone tab.
- Find “Audio Input” under the “Sound” settings.
- Under HDMI & Optical Input turn on “Auto Sensing of Optical In & HDMI” and also turn on “HDMI-CEC Power Control”.

That’s it! Your WiiM AMP is now set to be controlled from the TV. It’ll automatically wake up when the TV is turned on and play sound through the connected speakers.
Adjusting the volume from the TV’s remote control will also control the volume.
If for some reason you don't want the WiiM AMP to automatically turn on or be controlled by the TV then of course, don't turn these settings on, but in general for the best experience you'll want everything to be controlled seamlessly from your standard TV remote control.
We’re almost done, but there’s one last step to do before we can enjoy TV through your ceiling speakers…
Step 3: Setting Up Your TV
Now that you’ve made the connection and set your WiiM AMP up to receive the audio we need to make some minor adjustments to the TV.
You might find that your TV automatically picks up the WiiM AMP, adjusts the settings itself and the speakers are already playing your TV sound.
But if it isn’t then follow the below steps:
- Go to your TV’s Audio Output Settings and set the output format to PCM (Stereo).
- Switch your TV’s sound output mode to “HDMI” or similar (varies depending on your TV)
Every TV make and model is different so these are just guidelines, if you're not sure how to set yours then we'd recommend having a Google for instructions on your particular TV.
Step 4: Maximising Your Setup
Once everything's working smoothly, explore the WiiM AMP's streaming capabilities.
You can enjoy music from Spotify, Amazon Music, and other services whilst maintaining your television audio connection.
The unit's ability to seamlessly switch between inputs means you can enjoy both TV audio and music streaming without constantly changing cables.
Consider setting up different EQ profiles for different content types, perhaps a cinema mode for films and a dialogue-enhanced setting for news programmes.
The WiiM Home app makes switching between these profiles effortless as you can set custom EQ modes per source.
Troubleshooting
If you’re not getting sound from your TV after making the connection then read on to find some of the most common problems.
Before starting, we’d recommend that you first play music via WiFi to ensure that the speaker system is working as expected. You don’t want to be chasing a TV sound issue only to realise the speakers aren’t connected properly!
No Audio Output
Check the HDMI Port Connection on the TV
Check that the HDMI cable is connected to the port labeled HDMI ARC on the TV. Other HDMI ports on the TV do not output audio.
Check the TV Settings
- Check that the HDMI ARC function is enabled in the TV settings.
- Check that the TV's audio output is set to the connected WiiM device.
- Check that the TV's audio format is set correctly:
For the WiiM Amp Pro and WiiM Ultra: check that the TV's audio format is set to Stereo PCM or Dolby Digital.
For the WiiM Pro, WiiM Pro Plus, and WiiM Amp: check that the TV's audio format is set to Stereo PCM.
For instructions on how to do this please refer to your TV's user manual. - Check that CEC (Consumer Electronics Control) is enabled in your TV settings. This feature may have different names depending on the TV brand, such as AnyNet+ (Samsung), Simplink (LG), or Bravia Sync (Sony).
Check Source Input of Your WiiM Device
- Open the WiiM Home app
- Go to the Browse tab
- Check that the “HDMI ARC” input is selected in the Source Input section and that the volume is up.
Audio Delay or Sync Issues
- HDMI ARC settings: Enable CEC (Consumer Electronics Control) on both your television and WiiM AMP if available.
- Audio delay compensation: Many televisions have an audio delay setting that can help synchronise sound with pictures.
- App-based adjustment: The WiiM Home app includes audio delay settings that can fine-tune synchronisation.
Intermittent Connection Problems
- Power cycling: Turn off both devices, wait 30 seconds, then power on the WiiM AMP followed by your television.
- Cable quality: Poor-quality HDMI or optical cables can cause intermittent issues. Try a different cable if problems persist.
- Firmware updates: Check the WiiM Home app for any available firmware updates for your AMP.
Volume Control Issues
- CEC setup: When properly configured, HDMI CEC allows your TV remote to control the WiiM AMP's volumeectly.
- App volume control: You can always adjust volume through the WiiM Home app if the remote control isn't working.
You can find WiiM’s official TV troubleshooting guide here for further advice.
If you’ve done all of the above and it’s still not working then unfortunately it’s highly likely that your TV is at fault.
We’ve yet to have an issue with a WiiM AMP itself, it uses the HDMI ARC standards and is extremely reliable.
In this instance we’d recommend upgrading the television or connecting via optical audio cable instead. The only downside to optical is that you’ll need to control the volume via the WiiM App or remote rather than the televisions remote control.
How To Connect Via Optical Cable
Step 1: Locate the optical audio output on your television (usually a small, square port with a protective cover). Step 2: Connect the optical cable from your TV's optical output to the optical input on the WiiM AMP.
Step 3: In your television's audio settings, change the output to "Optical" or "Digital Audio Out.”
Final Thoughts
We’ve sold hundreds of WiiM AMP’s and a lot of our customers are connecting them to televisions with no issues.
From experience, it’s almost always a plug & play simple operation.
Connecting your TV to the WiiM AMP is one of the easiest ways to upgrade your home entertainment experience.
It’s one of those upgrades that has such a low cost but such a high impact!
Whether you're watching movies, gaming, or streaming your favourite shows, the improved audio quality will make a noticeable difference.
Note that this guide also applies to any other amplifier with a HDMI eARC input such as the Sonos AMP, Bluesound Powernode and Tangent TV II. Same concept, just change out the amplifier!