


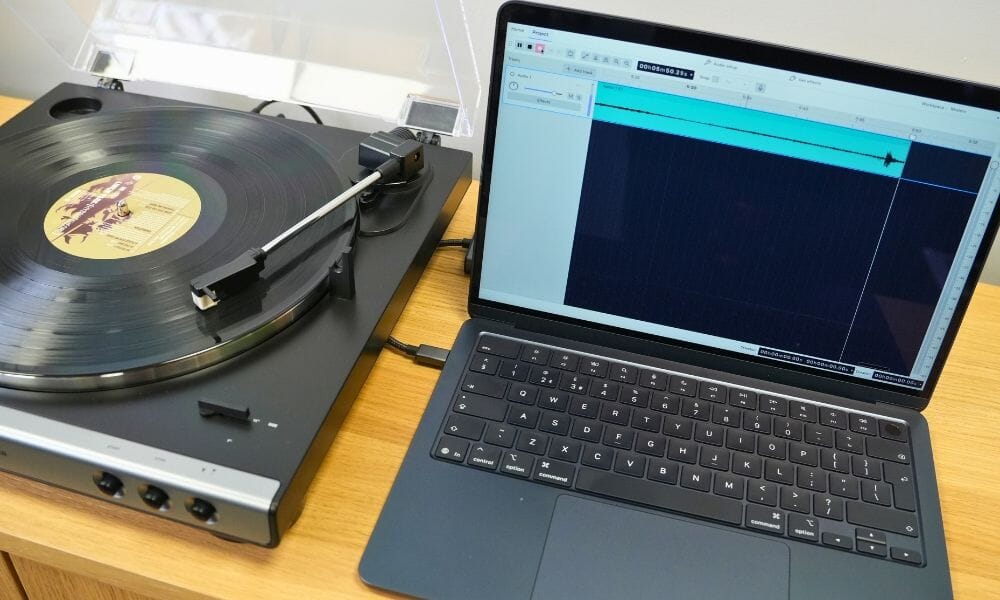
Whether it's a favourite album that isn't on streaming or a record you want to listen to away from your turntable, recording vinyl to your computer is simpler than you might think.
A USB turntable, a computer and free recording software are enough to get started.
For this guide, we're using an Audio-Technica LP60XUSB and a Mac, with Windows notes alongside the relevant steps.
Allow around an hour for your first album: you'll connect the turntable, make a short test recording, record both sides and export your songs.
What You'll Need
- A USB turntable. The LP60XUSB connects directly to your computer, with no separate phono preamp or audio interface needed.
- A Mac or Windows PC. You'll also need space to save your recordings.
- A USB cable. The LP60XUSB includes one. For a computer with only USB-C ports, use a suitable adapter or USB-C to USB-B data cable.
- Audacity. Download the free recording software from the official Audacity website. If you're using Audacity 4, use version 4.0.1 or later for multiple-file export. Menu wording may vary between versions.
- A record brush and stylus brush. Cleaning before recording helps reduce unwanted crackles.
- Headphones or computer speakers. You'll use these to check your recording.
Already have a turntable without USB? You may be able to use it with a USB audio interface or USB phono preamp. See the FAQ below.

Step 1: Prepare & Connect Your Turntable
If your turntable is new, assemble it using the supplied instructions first. The LP60XUSB manual covers fitting the platter and belt.
Place it on a level, stable surface, connect its power supply and remove the stylus protector.
Give the record a gentle clean with a record brush, and brush any fluff off the stylus from back to front.
Connect the turntable's USB output to your computer before opening Audacity.
The LP60XUSB normally appears as USB AUDIO CODEC, without a separate driver installation.
- Mac: check for it under System Settings › Sound › Input.
- Windows 11: check under Settings › System › Sound › Input. The name may include “USB Audio CODEC”.
If it doesn't appear, check the power and cable, then try another USB port or adapter.

Step 2: Set Up Audacity
Open Audacity and use Audio Setup to choose:
- Recording device: USB AUDIO CODEC, rather than your computer's built-in microphone.
- Recording channels: 2 (stereo), to preserve the record's left and right channels.
- Playback device: your computer's speakers or headphones.
For this guide, use a project sample rate of 48,000 Hz in the audio settings.
The LP60XUSB also supports 44,100 Hz, so you don't need to change a working setup that already uses that rate. Its USB recording resolution is 16-bit, which is suitable for everyday listening.
If the turntable isn't listed, refresh Audacity's audio devices or close and reopen the app with the turntable connected.
Allow Audacity To Record
Your computer may treat the turntable as a microphone input.
Allow microphone access when prompted, even though you're recording a record rather than your voice.
- Mac: open System Settings › Privacy & Security › Microphone and enable Audacity. If it isn't listed, try starting a recording to trigger the permission request, then reopen Audacity after allowing access.
- Windows 11: open Settings › Privacy & security › Microphone. Enable microphone access and access for desktop apps. On Windows 10, look under Settings › Privacy › Microphone.
Step 3: Make A 30-Second Test Recording
This quick check can save you recording a whole album with the wrong settings.
- Choose the speed printed on the record label, usually 33 or 45rpm. On the LP60XUSB, also set the size selector to match your record.
- Click Record in Audacity, then start the turntable.
- Record about 30 seconds of music. You should see a waveform appearing on screen.
- Stop recording and stop the turntable.
- Play the test back through your computer speakers or headphones. Check that you can hear the music clearly and that it isn't distorted.
Watch the recording meter during the test. Peaks around -12dB to -6dB are a useful target if you can adjust the input level. You don't need to hit an exact number: the important thing is to avoid the meter reaching 0dB and clipping, which creates harsh distortion.
The LP60XUSB has no recording-level knob. If your computer provides an input-volume control for it, you can use that to adjust the level. A slightly quiet recording is usually fine and can be made louder afterwards. If it sounds distorted, resolve that before recording the album.
Once you're happy, delete the test recording or start a new project.
Want to listen while recording? Enable Audacity's input monitoring and use headphones. This is optional: you can also check the recording afterwards. If listening through speakers connected to the turntable, keep them away from it and the volume low to reduce vibration.

Step 4: Record Both Sides
- Click Record in Audacity before starting the turntable, so you don't miss the beginning.
- Press START on the LP60XUSB and let the side play. Avoid bumping the turntable or its supporting surface.
- When the side finishes and the arm returns, pause the recording in Audacity.
- Turn the record over, brush side B, resume recording and start the turntable again.
- When side B finishes, stop recording and save your project.
Recording happens in real time, so a 20-minute side takes 20 minutes. Keeping both sides in one project makes it easy to split the album into songs later.
Save your work: use Cmd + S on Mac or Ctrl + S on Windows. Saving an Audacity project lets you return to the editing. It doesn't create the music files for your phone or music player yet; that's what exporting does.
Step 5: Trim The Recording
Remove the unwanted silence and handling noise before the first song, between the two sides and after the final song.
Select the unwanted section of the waveform and delete it, listening around each edit to check you haven't cut off any music.
Keep the natural gaps between songs. You don't need to remove every trace of surface noise.
Optional: Adjust The Volume Or Reduce Clicks
- If the recording is too quiet: select the whole recording and use Audacity's Normalize effect, with a peak level of -1dB.
- If a few clicks are distracting: try Click Removal on a small section first. Listen before and after, and undo it if it affects the music.
If your recording already sounds good, skip these adjustments.
Cleaning the record before recording often helps more than trying to repair it afterwards.
Step 6: Label The Songs & Export
Labels tell Audacity where each song starts, so it can create a separate file for each one.
- Click at the start of the first song.
- Add a label using Cmd + B on Mac or Ctrl + B on Windows, then type the song title.
- Repeat at the start of every song. Zoom in and listen around the gaps to find the right position.
- Open File › Export Audio and choose the option for multiple files, split by labels.
- Choose your file format and a destination folder, such as Artist - Album. Use the label names for filenames, with track numbering if offered.
- Add the artist and album details in the metadata options, and check the song titles and track order before completing the export.
“Metadata” simply means the artist, album and song information your music player displays. You can correct these details later in a music library app if needed.
For live albums or songs that flow into each other, place the labels at the song changes without deleting any audio.
Which File Format Should You Choose?
For straightforward everyday listening, choose MP3 at 320kbps.
It's widely supported and keeps file sizes manageable. If you also want a lossless copy to keep, export AIFF or FLAC as well.
- MP3: convenient for compatible phones, car stereos and music players. It uses lossy compression to make smaller files.
- AIFF: a lossless option that works with Apple's Music app on Mac, including track information. Files are larger.
- FLAC: lossless quality with smaller files than uncompressed formats. Useful for compatible music players and network streamers, but Apple's Music app doesn't support it directly.
For lossless exports from the LP60XUSB, 16-bit at the recording's sample rate is sufficient. You don't need higher-resolution settings to make a good copy.
Step 7: Check Your Exported Files
Open the destination folder and play a few of the exported songs.
Check their beginnings and endings, and make sure the names and running order are correct.
On a Mac, you can import MP3 or AIFF files into the Music app.
On Windows, use a music player that supports your chosen format. Adding files to your computer's library doesn't automatically transfer them to your phone; use your usual sync or transfer method.
Album artwork is optional and can be added later through your music app.
Step 8: Back Up Your Recording
Keep another copy of your exported files on an external drive or in private cloud storage.
Keep the Audacity project too if you think you may want to change the edits later.
You've spent time recording the album, so check your backup before deleting anything from your computer.
Troubleshooting: Common Problems
- The recording is a flat line: check that Audacity is using USB AUDIO CODEC, the record is playing and microphone access is allowed. Restart Audacity after changing permissions.
- The turntable doesn't appear: check the power and USB connection, try another port or adapter, then refresh the device list or reopen Audacity.
- You can see a waveform but hear nothing: check Audacity's playback device and your computer's volume. Stop recording and play the test back. Hearing sound during recording requires input monitoring.
- The recording sounds distorted: check for clipping on the recording meter and reduce the input level if a control is available. Also check the stylus for dirt or wear.
- There's crackling: clean the record and stylus, then try again. Some surface noise may remain on worn records.
- The music plays too fast or too slow: check the speed printed on the record label and the turntable's speed setting first.
Which USB Turntable Should You Choose?
For a simple starting point: the Audio-Technica LP60XUSB used in this guide offers USB recording and fully automatic playback. We also offer it with Edifier powered speakers as a complete system.
For more control and room to upgrade: consider the Audio-Technica LP120XBT-USB. Its adjustable tonearm and replaceable cartridge offer more flexibility, alongside USB recording and Bluetooth listening.
Compare the options in our USB turntables collection.
Frequently Asked Questions
Can I Record Vinyl Without A USB Turntable?
Yes. You'll need a phono preamp, either built into your turntable or amplifier or supplied separately, and a suitable USB audio interface to connect its line-level output to your computer.
Alternatively, a phono preamp with a USB output can handle both jobs. Don't connect a turntable's unamplified phono output directly to an ordinary line input.
Do I Have to Split The Album into Songs?
No. If you prefer one file containing the whole album, skip the labels and export the entire recording as a single file. Separate songs are simply more convenient when you want to skip tracks.
Does Recording Cause Extra Wear To My Records?
Recording through USB involves playing the record normally. Use a clean record and a stylus in good condition, just as you would for everyday listening.
Is It Legal to Copy Your Own Vinyl in the UK?
Owning a record doesn't automatically give you permission to copy its music. The UK's private-copying exception was quashed in 2015. For copyright-protected recordings, you generally need the rights holder's permission unless an applicable exception allows the copying. See the UK government's copyright guidance and don't share or sell copies without the necessary rights.
Ready to Try Your First Recording?
Start with a clean record and a short test.
Once that sounds right, record both sides, export your files and make a backup. You can always return to artwork and more detailed editing later.


